Saturday, July 30, 2011

Triple Chocolate Fudge Peanut Butter Cookies

My children were in VBS this last week. If you have not had the chance to put your children in Vacation Bible School yet, look into a local church that has the program because it really is an amazing program. Next year I am looking forward to volunteering as well. Anyways the volunteers did such an amazing job this week I wanted to something nice for them. So I figured I should use my baking skills to do that. I baked these cookies. So I had a total kitchen FAIL when I first made these. In all my excitedness (totally new word) I forgot to put eggs in my dough. Yeah seriously bone head move. The original recipe calls for you to refrigerate the dough for 4 to 6 hours. So I did that. Well when I pulled the dough out 6 hours later it was like a hard rock. I knew that was not right. So I went and looked at the recipe again and ding, the light bulb totally appeared over my head and I knew I had forgotten the eggs. So I redid it all and adapted the recipe. The cookies are amazing and the VBS workers loved them. So win win!


Recipe from How Sweet Eats adapted by me

Ingredients

1 cup butter, at room temperature

1/2 cup peanut butter

1 1/2 cups sugar

2 eggs

2 teaspoons vanilla extract

2 cups flour

1/2 cup cocoa powder

1 heaping teaspoon of baking soda

1/4 teaspoon salt

4 ounces semi-sweet chocolate, melted

1 cup milk chocolate can substitute semi sweet chips

Directions

Cream butter, peanut butter, sugar, eggs and vanilla until fluffy.

Add flour, cocoa powder, baking soda and salt in a separate bowl and mix until combined. Add the flour mixture to the butter mixture and add in melted semi-sweet chocolate and mix until just combined.

Fold in chocolate chips. Take a cookie scoop and scoop dough on to parchment lined cookie sheets. While cookies are cooking put the dough in the fridge for 20 mins and repeat process.

Bake at 350 for 10-12 minutes.

Sunday, July 24, 2011

Cupcake Crafts

If that title doesn't grab you, I don't know what will. Let me introduce you to this seriously awesome concept. Check out the facebook site HERE also be sure to check out her website HERE. Basically in a nut shell PK offers you literally everything you need to decorate cute cupcakes, which if you are decorating challenged like yours truly you will love this website.

I won a giveaway on her facebook page. I won the directions to whichever cupcake design I would like. So I picked the mini tweets (super duper cute name) & told PK I would write a review once I got them done. She then very generously said she would send me the whole kit & caboodle. I was so shocked because this would be my first review since doing the whole food blogger thing. So I agreed 100 percent. I went on vacation to the states right after the box arrived so I just got a chance to make them today and here are my honest thoughts and opinions.


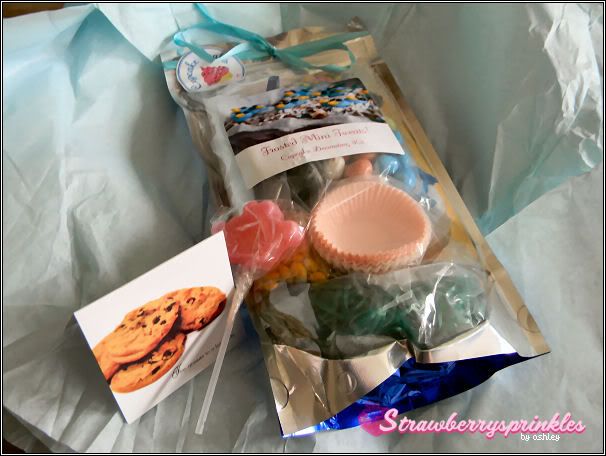
So when I opened the very prettily packaged box, I was so surprised at PK's personalized note. She wrote me a hand written card and it was so sweet and she included a lollipop that my boys fought over hee hee. I really loved how neat and pretty everything was.


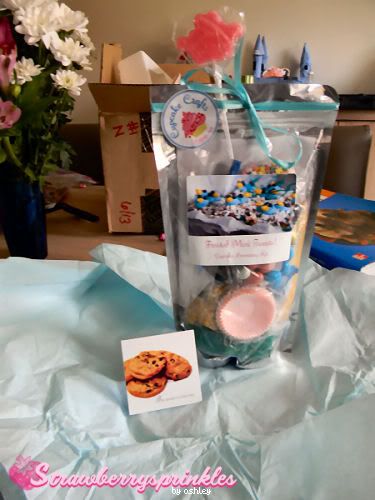
How cute is the little card?!?!? I was seriously impressed.


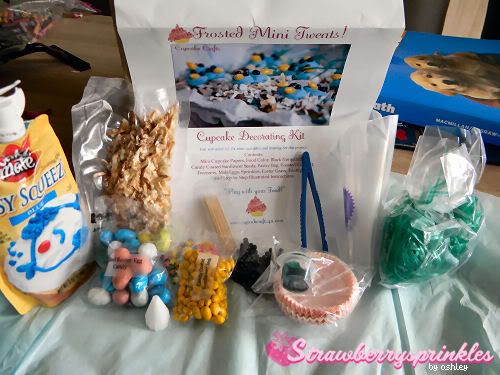
When the company says everything you need to decorate your cupcakes they are not kidding. You can even on the website order some cupcake mix! I was impressed with everything in the bag. I thought it was really well put together and the quality was great. It also included well written and very visual directions on how to put together the cupcakes as well as very helpful hints and a family recipe.


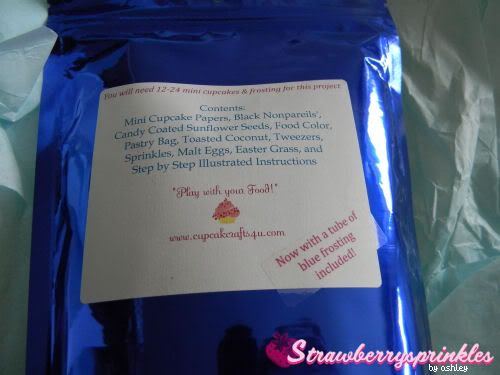
Here is the back of the packaging. I really love the saying on the back "Play with your Food." I totally agree! What fun would food be if you could not be creative and play? Not very fun that is for sure.


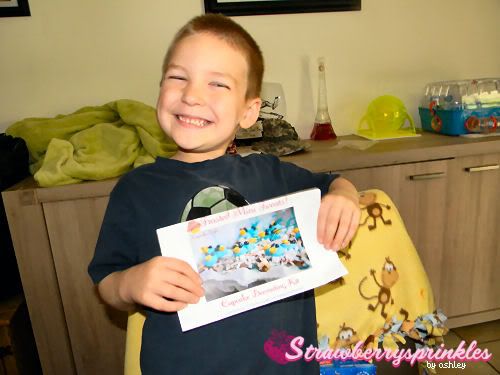
So I found one of my helpers and we were ready to get down to some serious cupcake business! I usually have two helpers but the other one was passed out on the couch because he had such a good time at his sleepover he wore his little self out. So I was down to one and boy was he eager to get his cupcake on.


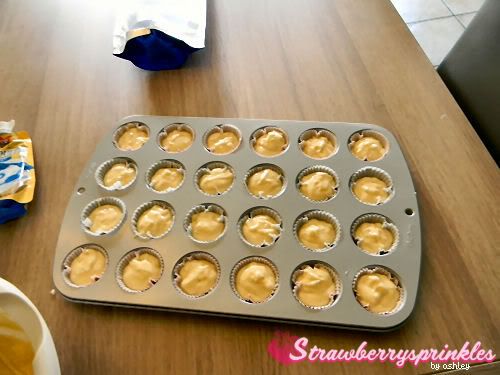
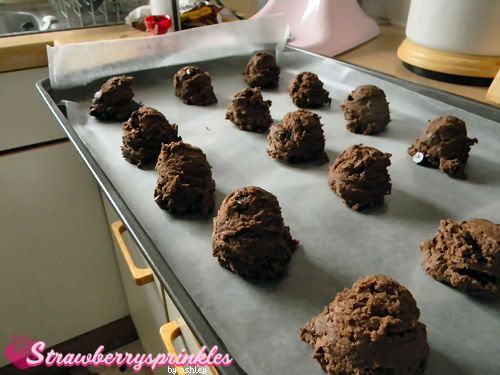
My little helper, helped me mix up the batter and fill up the cupcake liners so we could get them in the oven.


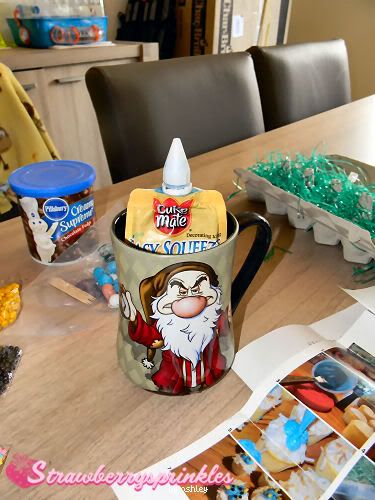
I then noticed that the blue frosting was stiff. So I thought I would get it more pliable if I could soak the bag in some warm water so it would come out a little easier. The cup is pretty awesome though I must say. I got the cup at Disney World on my vacation in June. I loved being back in the states for a little while.


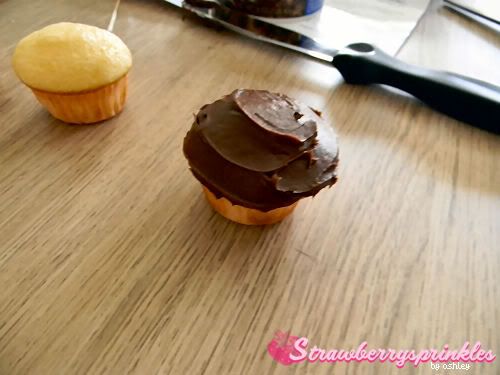
So seriously how cute are mini cupcakes? I don't make them often but I think that is about to change because seriously look at this little guy, he screams cute! I decided to go with chocolate frosting because I didn't want to whip up a bunch of home made frosting because I didn't think it would work with this. So I had chocolate store bought frosting and that is what I went with.


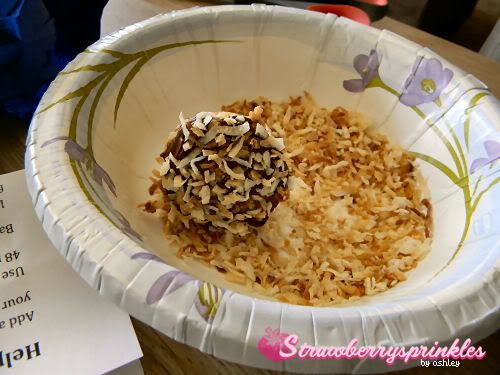
Rolling the cupcakes in the "nest material" or toasted coconut was really easy and took well and looked very nice. I bet any little blue bird would love to perch its self on that.


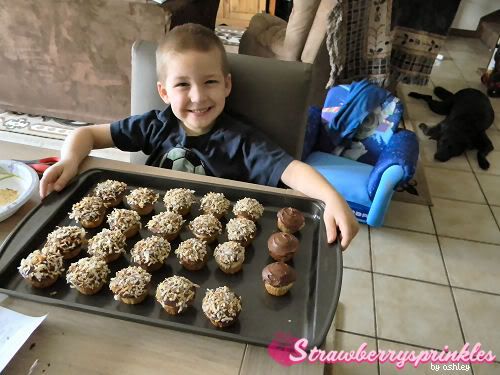
There is my little helper again and he asked so nicely that I obliged his request. He asked me to leave a few without the coconut. I used the cookie sheet to hold the cupcakes for me and it worked well and caught any mess while decorating.


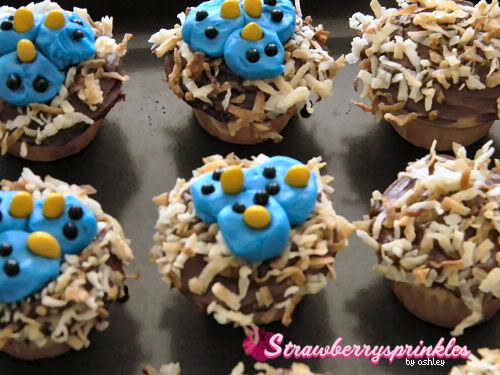
Now onto the fun part. The only thing I would change with this is the blue frosting. The bag of blue frosting really did not seem to want to come out. I ended up taking all the frosting out of the bag and putting it into the pastry bag that was provided and it was a little easier to work with but I think I would make my own frosting and tint it when I do these again. That is the only thing in the kit that I was not a fan of. The results were fantastic though and I am not complaining.


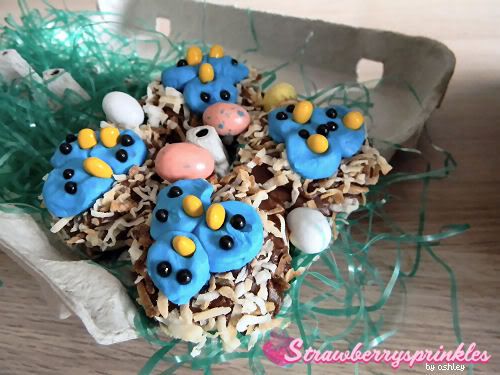
You can really be creative with these little birds. I loved decorating and putting these together. I took a egg carton and used the grass that is provided and my helper pushed all the grass down into the carton. He loved doing that. What a cute way to present this as well.


I took 3 of the candy eggs provided and put them on the cupcake and then put a momma birdie on top. I thought it was super cute!


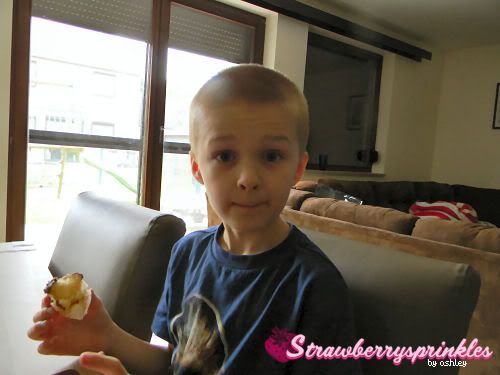
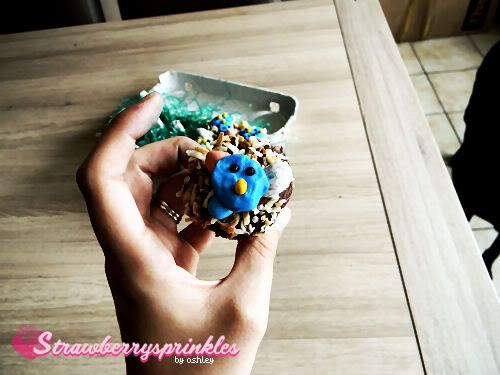
Guess who decided to grace us with his presence? That is right my other little helper. He decided to chomp down on one of the cute cupcakes.


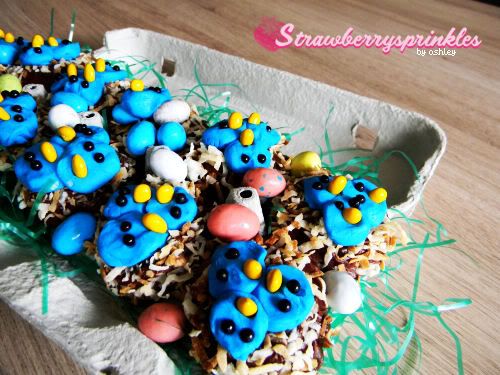
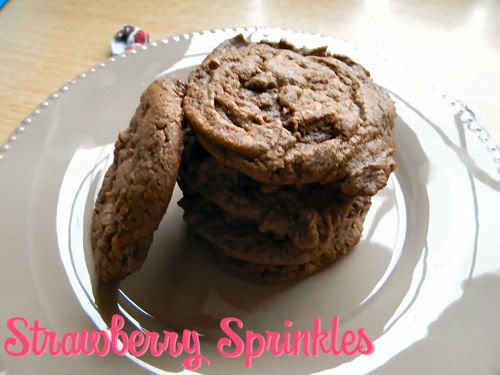
Here are pictures of the final results. Now I can not decorate honestly to save my life. I can barely frost a cake. Did you see my caramel cake? Enough said haha. So seriously look how cute these look! This was all due to the creativeness and ingenuity of Cupcake Crafts!


These are perfect for school projects, school birthday parties, any kind of birthday party, gifts for friends, or even to just take to work to surprise co workers. You don't have to be a seasoned decorator thanks to Cupcake Crafts. I am living proof of that and I really have to thank PK for giving me the opportunity to test these & for making me look like a cupcake pro! You rock & I can not say enough good things about your products.

I really hope you guys will check her out and if you decide to order from her tell her Ashley over at Strawberry Sprinkles sent you.

Once again find her awesome products

on Facebook Also find her on her website

Friday, July 22, 2011

Banana Caramel Cake w/ frosting

So if you have not gathered yet I am a huge fan of Bananas. I could eat them for breakfast, lunch, & dinner. I love finding new ways to incorporate them into things. So I ran across this recipe and new that I had to try this one. I had dinner guests over so it worked out well and gave me the perfect excuse to make it up. Now I am seriously not a good froster when it comes to cakes. Its something I need to practice. I hope you guys try it because it was really really good.

Image and video hosting by TinyPic

Recipe from the kitchn

Ingredients:

3/4 cup butter
1 cup white sugar
1 cup brown sugar
3 eggs
3 cups all-purpose flour
1 1/2 teaspoons baking soda
1/2 teaspoon salt
1 1/2 cups milk
1 1/2 cups mashed bananas
1 1/2 cups caramel sauce

Directions:

1.Heat oven to 325

2. Cream the butter and sugar until fluffy then add the eggs and beat until silky and lightened.

3. Sift the flour with the baking soda and salt.

4. Whisk the milk and mashed bananas in a separate bowl & add to the eggs and butter, alternating with the flour. Beat just until smooth.

5. Pour batter into the prepared pans. Pour half the caramel sauce into each pan, and swirl with a knife. The pans will be quite full. Put in the oven carefully and bake for about 60 minutes, or until the centers are set and a knife comes out clean.

Caramel Buttercream- Recipe from I am Baker

Ingredients:

4 cups powder sugar

1/4 cup shortening

1 tablespoon caramel topping

1-6 tablespoons of milk to reach desired consistency

Directions:

1. Cream shortening, milk, and caramel together on low speed and slowly add in sugar until fully incorporated.


Tips & Suggestions:

I always have amazing results with cakes coming out of the pan when I rub the pan down with butter and then spray a little of the baking spray with flour.

Also with the frosting it does not stay on the cake very well so don't use a ton of milk. I should have used less with mine.

Monday, July 11, 2011

Mississippi Mud Brownies

So while on vacation these popped up on one the blogs I follow. The lady at best bites featured these, they are a Southern Living recipe. I thought they looked really good so I decided to make them and seriously wow! They are really really good. At first I thought hmm maybe they would be too chocolaty but nope they were yummy. Also a small tip with these. Try cutting these brownies with a plastic knife because if you don't a regular metal knife will just make these ooey and gooey and a mess to get onto a plate.

Image and video hosting by TinyPic

Ingredients

Brownies:
1 1/2 c. all-purpose flour
2 c. sugar
1/2 c. unsweetened cocoa powder
2 tsp. baking powder
1/2 tsp. table salt
1 c. (2 sticks) melted butter (no substitutions)
4 eggs, lightly beaten
1 Tbsp. vanilla extract
1 c. semi-sweet chocolate chips
3 c. mini marshmallows

Frosting:
1/2 c. melted butter
1/3 c. unsweetened cocoa powder
1/3 c. evaporated milk
1 lb. powdered sugar
1 tsp. vanilla

Directions:

Preheat oven to 350. Lightly grease (and flour, if desired) a 9×13″ pan. Combine the flour, sugar, cocoa powder, baking powder, and salt in a large bowl or the bowl of your stand mixer. Add the melted butter, whisked eggs, and vanilla. Beat on medium speed for about 3 minutes, scraping the bowl occasionally. Add in the chocolate chips and spread the batter in the prepared pan. Bake for 40-50 minutes (or a little less if using a metal pan) or until a pick inserted into the center of the brownies comes out clean.

When the brownies are done, remove from the oven and spread the marshmallows on top. Return the pan to the oven for 2-3 minutes or until the marshmallows are puffed and starting to turn golden brown on top. Remove from oven and cool completely.

While the brownies are cooling, beat together the frosting ingredients on high speed until light and fluffy. Spread over the cooled brownies and cut into squares. Makes about 24 brownies.

** Use a plastic knife when cutting into these! Also I only cooked mine for about 35 mins because they were done and I like my brownies soft not crunchy. Just cook them until your liking. Test them with a tooth pick. If it comes out with the mix still runny cook it for a little more. If it comes out with just a few crumbs stuck to it, perfect!**

Wednesday, July 6, 2011

Home made pound cake with Home made whip cream

So I am on vacation. I normally live in Belgium but came home to visit my parents in Warner Robins Georgia. My husband and I were stationed here before Belgium and this is really where I consider home. So I have really enjoyed being back and shopping for things I can not get in Belgium and loving all the fast food =P My waist has not but I can always lose it when I get home. Anyways I decided to make a dessert for the 4th of July. I decided on home made pound cake by Paula Deen and then home made whip cream that I found on Kitchen Boss. I hope you guys will enjoy.

Image and video hosting by TinyPic

Pound Cake Ingredients

1 1/2 cups (3 sticks) butter, at room temperature
1 (8 ounce) package low fat cream cheese, at room temperature
3 cups granulated white sugar
6 large eggs
3 cups cake flour, sifted twice after measuring
pinch of salt
1 teaspoon vanilla extract
1 teaspoon almond extract


Directions

1. Preheat oven to 325 degrees F. Grease and flour a 10-inch bundt pan (I like to use the nonstick spray that is especially for baking... with the flour mixed into it). Spray the middle part of the Bundt Pan really really well!

2. In a large bowl, cream together butter and cream cheese with an electric mixer until well combined. Add in sugar and continue to mix for about 6 minutes, until fluffy. Add eggs, one at a time, beating after each addition, until well blended. Gradually add the flour, beating and scraping down the sides until it is all incorporated. Mix in salt and extracts.

3. Pour into prepared pan. Hit the pan gently on the counter about 5 times to help settle the batter and remove any air pockets. Bake for about 1 1/2 hours. The cake is done when it pulls away from the sides of the pan and a toothpick inserted comes out clean.

4. Remove from the oven and let cool in the pan for about 15 minutes. Invert the cake onto a wire rack and let cool completely before serving.

Fresh Whip Cream

Ingredients

3 cups of Heavy Whip Cream
1/2 cup of sugar (use as much to your taste) I ended up putting almost 3/4 C because I like mine sweeter.

Directions:
1. Put the cream and sugar in a bowl and whip with on high speed with a hand mixer fitted with the blending attachments. Do not over mix or you’ll end up with butter.
2. The cream can be refrigerated in an airtight container for up to 3 days. Whip by hand to refresh before using.


Fruit Mixture:
Mix two or three berries with a little bit of water and sugar and refrigerated until serving. Serve over the pound cake for super yumminess!